Social Media Image Resizer: How to Resize Images for Every Platform
Every social media platform has different image dimensions and display requirements. An image designed for a square post may not fit properly into a vertical Story or a wide YouTube thumbnail. Manually creating separate versions can also take extra time. A social media image resizer makes this process easier by helping you adjust one image into different dimensions for multiple platforms.
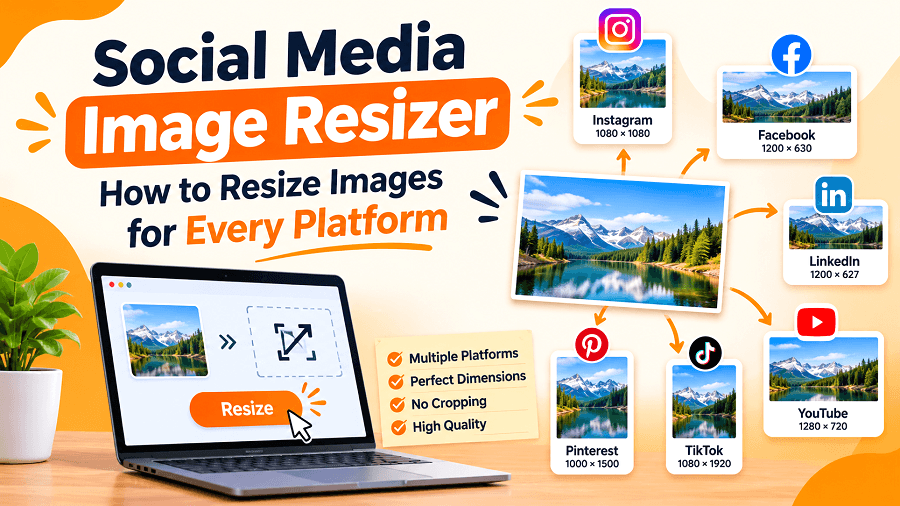
Have you ever created a social media image that looks perfect on Instagram but gets cropped when you upload it to Facebook or LinkedIn? This is a common problem for content creators, social media managers, and online businesses.
Every social media platform has different image dimensions and display requirements. An image designed for a square post may not fit properly into a vertical Story or a wide YouTube thumbnail. Manually creating separate versions can also take extra time.
A social media image resizer makes this process easier by helping you adjust one image into different dimensions for multiple platforms.
Whether you manage business accounts, promote products, or create social media content, using the correct image sizes can help your visuals look more consistent and professional.
In this guide, you will learn how to resize images for Instagram, Facebook, LinkedIn, YouTube, Pinterest, TikTok, and X, avoid common cropping problems, and prepare platform-ready images using an online image resizer.
What Is a Social Media Image Resizer?
A social media image resizer is an online tool that changes an image's width, height, or aspect ratio to match the requirements of different social media platforms.
For example, you can take one product photograph and prepare different versions for an Instagram post, Facebook post, Pinterest Pin, and LinkedIn update.
Instead of manually editing each image, an image resizing tool allows you to select the required dimensions and create multiple versions.
Most image resizers help users:
Change image dimensions for different platforms.
Adjust images to square, portrait, landscape, and vertical formats.
Fit images into a frame without unwanted cropping.
Customize background colors where supported.
Prepare multiple image sizes from one source image.
Download resized images for publishing.
A social media photo resizer is useful for businesses, marketers, bloggers, online sellers, and anyone who regularly publishes visual content.
Why Do Different Social Media Platforms Need Different Image Sizes?
Social media platforms display images in different layouts. Instagram uses square and portrait posts, Pinterest focuses on vertical Pins, and YouTube uses landscape thumbnails.
Using the wrong image dimensions can cause several problems:
1. Unwanted cropping: Important parts of a photograph, product, or design may disappear when a platform adjusts the image.
2. Blurry visuals: Enlarging a small image can make it look soft or pixelated.
3. Poor text placement: Headlines, logos, and promotional messages may become difficult to read when the image is resized.
4. Inconsistent branding: Different image proportions can affect how your visual content appears across platforms.
5. Extra editing work: Creating separate graphics manually for every platform can slow down your content workflow.
Choosing suitable image dimensions before publishing helps avoid many of these problems.
Recommended Social Media Image Sizes for 2026–2027
The correct image size depends on the platform and the type of content you are publishing.
Here is a practical reference for commonly used image formats. These are working recommendations, not a guarantee that every platform placement accepts only one fixed size.
Platform | Image type | Common dimensions |
Square post | 1080 × 1080 px | |
Portrait post | 1080 × 1350 px | |
Story / Reel | 1080 × 1920 px | |
Feed image | 1200 × 630 px | |
Cover image | 851 × 312 px | |
Feed image | 1200 × 627 px | |
Personal cover | 1584 × 396 px | |
YouTube | Thumbnail | 1280 × 720 px |
YouTube | Channel banner | 2560 × 1440 px |
Standard Pin | 1000 × 1500 px | |
TikTok | Vertical content | 1080 × 1920 px |
X | Header image | 1500 × 500 px |
X | Landscape post | 1200 × 675 px |
Platform specifications can change, so check the latest requirements before preparing important campaigns. For example, Instagram supports additional portrait proportions, and YouTube's current thumbnail guidance may allow larger files and dimensions.
How to Resize Images for Every Social Media Platform
Resizing images does not have to involve opening a separate design application for every platform. You can follow a simple process using an online social media image resizer.
Here are the steps:
Step 1: Choose the Image You Want to Resize
Start by selecting a clear image from your device.
It could be:
A product photograph.
A promotional graphic.
A business announcement.
A social media campaign image.
A blog featured image.
Use the best-quality original file available. A larger source image gives you more flexibility when preparing different dimensions.
Step 2: Select the Required Social Media Platforms
Choose the platforms where you want to publish your image.
For example, if you are promoting a new product, you may need:
Instagram square post.
Facebook feed image.
LinkedIn post graphic.
Pinterest Pin.
YouTube thumbnail.
Selecting the correct presets helps create images with the required width and height.
Step 3: Adjust the Image Fit and Background
Different aspect ratios can change how an image appears.
You generally have two choices:
Crop to fill: The image fills the complete frame, but some parts may be removed.
Contain or fit: The entire image remains visible, with additional background space where needed.
Choose the method based on your design.
For product photographs, keeping the complete product visible may be more important than filling every corner. For promotional graphics, cropping may work when the important text and visual elements remain inside the frame.
Step 4: Customize the Background and Text
Some image resizing tools provide additional customization features.
Depending on the tool, you may be able to:
Change the background color.
Add optional overlay text.
Adjust the image's placement.
Create different visual versions for different platforms.
Keep the design simple. Avoid placing important text or logos too close to the edges.
Step 5: Generate and Download Your Images
Preview the resized versions before downloading them.
Check that:
The main subject is visible.
Text is readable.
Important details are not cropped.
The image has the required dimensions.
The background looks appropriate.
Once everything looks correct, download the individual images or use a ZIP export if the tool supports it.
How to Resize One Image for Multiple Social Media Platforms Using GenImager
If you regularly publish content across several platforms, preparing each image separately can become repetitive.
GenImager's Social Media Image Resizer helps simplify this process by allowing users to select multiple platform presets and generate different image sizes from one uploaded image.
Here is how you can use it:
1. Upload your image: Visit the GenImager Image Resizer and upload an image from your device.
2. Select platform presets: Choose the required formats for Instagram, Facebook, LinkedIn, YouTube, Pinterest, TikTok, or X.
3. Choose the fit mode: Select a suitable image-fitting method based on whether you want to keep the entire image visible or fill the frame.
4. Customize the appearance: Adjust the background color and add optional overlay text if required.
5. Generate image sizes: Select the required presets and generate the resized versions.
6. Download your images: Save individual files or download the generated images together as a ZIP file.
This workflow is useful when preparing graphics for product promotions, social media campaigns, business announcements, and regular content publishing.
How to Resize Images Without Losing Quality
Image resizing can affect visual clarity, especially when a small image is enlarged significantly or when the file is compressed multiple times.
Although no resizing method can restore missing image detail, a few simple practices can help maintain better results.
Use a high-resolution original: Start with the largest suitable source image instead of enlarging a small thumbnail.
Choose the correct dimensions: Avoid unnecessary resizing or repeated changes to the same image.
Understand cropping and fitting: Cropping removes parts of an image, while fitting keeps the complete image visible within a frame.
Select the appropriate file format:
JPG works well for photographs.
PNG is useful for graphics, text, and images that need transparency.
WebP can be suitable for web images where the destination supports it.
Check the final output: Zoom in and inspect text, edges, product details, and important visual elements before publishing.
Remember that social media platforms may compress uploaded images. Therefore, always review the final appearance after uploading.
Common Social Media Image Resizing Mistakes to Avoid
Even a good image can look unsuitable when the wrong resizing method is used.
Here are some mistakes to watch for:
Common mistake | How to avoid it |
Using one size for every platform | Select the appropriate platform dimensions |
Cropping important details | Use a fit mode when the complete image must remain visible |
Enlarging low-resolution images | Start with a high-quality original |
Placing text near the edges | Maintain enough space around important elements |
Ignoring mobile layouts | Preview images on smaller screens |
Using incorrect file formats | Choose JPG, PNG, or WebP based on the content and platform |
Skipping the final preview | Check each resized version before downloading |
These small checks can help you prepare more consistent images for different social media channels.
Who Can Benefit from an Online Social Media Image Resizer?
An online image resizer is useful for different types of users who regularly create or publish visual content.
Small business owners: Prepare promotional images, product announcements, and branded graphics for multiple social networks.
Social media managers: Create different image dimensions for client accounts without manually editing every graphic.
Content creators: Adapt photographs and graphics for posts, Stories, video thumbnails, and other content formats.
Digital marketers: Prepare campaign visuals for different social platforms while maintaining a consistent design.
Online sellers: Resize product photographs and promotional images for social media marketing.
Bloggers and publishers: Prepare supporting graphics and promotional visuals to share blog content across different channels.
The right workflow depends on your publishing needs, the number of platforms you use, and the type of visuals you create.
Frequently Asked Questions About Social Media Image Resizing
1. What is the best social media image resizer?
The best social media image resizer is one that provides suitable platform presets, supports the required image dimensions, and offers useful fitting and download options. GenImager allows users to select multiple social media presets and generate different image sizes from one uploaded image.
2. How do I resize one image for multiple social media platforms?
Upload your original image to an online image resizer, select the required platform presets, adjust the fit mode, and generate the different sizes. Review each version before downloading it.
3. How can I resize images without cropping?
Choose a contain or fit option instead of crop-to-fill. This keeps the complete image visible inside the selected dimensions. Depending on the aspect ratio, additional background space may appear around the image.
4. Does resizing an image reduce its quality?
Resizing can affect image quality, particularly when a small image is enlarged or compressed repeatedly. Starting with a high-resolution original and selecting suitable dimensions can help maintain better clarity.
5. What is the best image size for Instagram and Facebook?
Common working dimensions include 1080 × 1080 pixels for square posts, 1080 × 1350 pixels for portrait posts, and 1080 × 1920 pixels for Stories and Reels. Facebook also uses different dimensions for cover images and other placements.
6. Can I download multiple resized social media images together?
Yes, some online image resizers support multiple downloads or ZIP exports. GenImager allows users to download generated images individually or together as a ZIP file.
Conclusion: Make Social Media Image Resizing Easier
Creating images for different social media platforms does not have to involve repeated manual editing. By selecting the correct dimensions, using suitable fit modes, and checking the final output, you can prepare visuals that work across different channels.
A social media image resizer can make this process more organized, especially for businesses, content creators, and marketers who publish regularly.
If you want to prepare multiple platform-specific image sizes from one source image, explore the GenImager Social Media Image Resizer. Upload your image, select your preferred formats, and create resized visuals for your next social media campaign.